
By Jan Gutowski, Creativity Coach
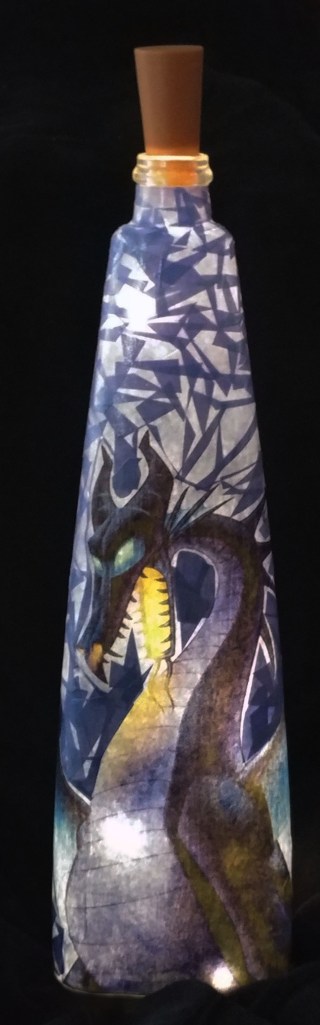
One of the easiest things for me to hoard are interesting jars and bottles. I try to keep this vice at bay, but when I come across something that looks interesting or different, I immediately see a project coming on. One of my favorite and most relaxing projects (not to mention, easy!) is using decoupage to create paper mosaic bottles. There is no limit to what you can create, and mosaic bottles look even more spectacular when they are lit up! For this project, I found images from children’s books which I wanted to re-purpose.
collection for my mantle!
The supplies for this project are few… and, this type of project is GREAT for photo collages! (think gifts for Grandma!)
- Standard paper print of whatever you like to serve as an applique to the bottle, and then colored paper (or printed color paper) for the rest of the bottle.
- Mod Podge decoupage sealer
- Mod Podge spray sealer (for finishing)
- Brushes, brush rinse cup, scissors
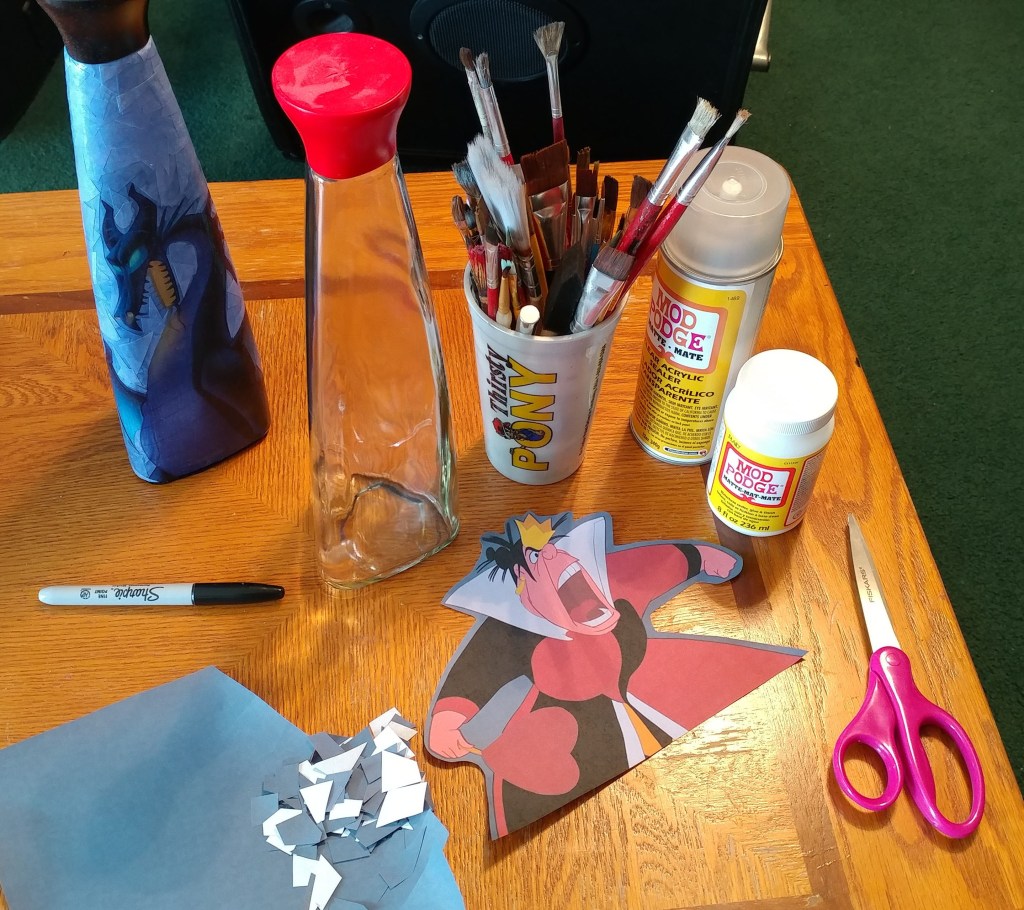
Before anything, clean the bottle well! If not cleaned well, dust or debris will find its way into the mosaic, and when lit up, it WILL show through. First cut out your main image as close to the image edge as possible. Once cut, apply a coat of Mod Podge on the bottle everywhere the image will come into contact. NOTE: Some images will wrap around the entire circumference of the bottle, so make sure you apply enough Mod Podge for the image to adhere to. VERY CAREFULLY wrap the image over the coated area of the bottle, taking care to watch for air bubbles. Depending on the shape of the bottle, you may have to make “flex cuts” in order for the image to lie as flat as possible along tricky curves of the bottle.
For this project, I reused long, slender bottles which are easier to adhere images to. Once the main image is applied, let the bottle rest for 1 1/2-2 hours. While the bottle is setting, use this time to cut small sections of the colored paper which will be used for the surrounding mosaic. This can be a solid color, like pictured above; or use multiple colors for a stained-glass effect. The project will naturally take on an interesting texture as you apply and overlap these small pieces onto the bottle around the outside of the main image.
Once the main image on the bottle has “rested”, apply a coat of Mod Podge over it to seal it. Next comes the more time-consuming part… adhering all the small pieces in varied, overlapping textures until the entire bottle is covered. Use the Mod Podge as “glue” as you work, being careful not to saturate too much too soon. Also, be careful of your fingers getting sticky and rubbing off some of the color. Once all the mosaic paper bits are applied, place a complete cover coat of Mod Podge on the entire bottle surface and let rest for at least 2 hours. Afterward, take the bottle outdoors (well-vented) and spray a sealer coat of Mod Podge spray sealant (I use matte, but gloss also works well).
If you would like to light up the bottle, use a set of LED string lights specifically for use in bottles, like this one:
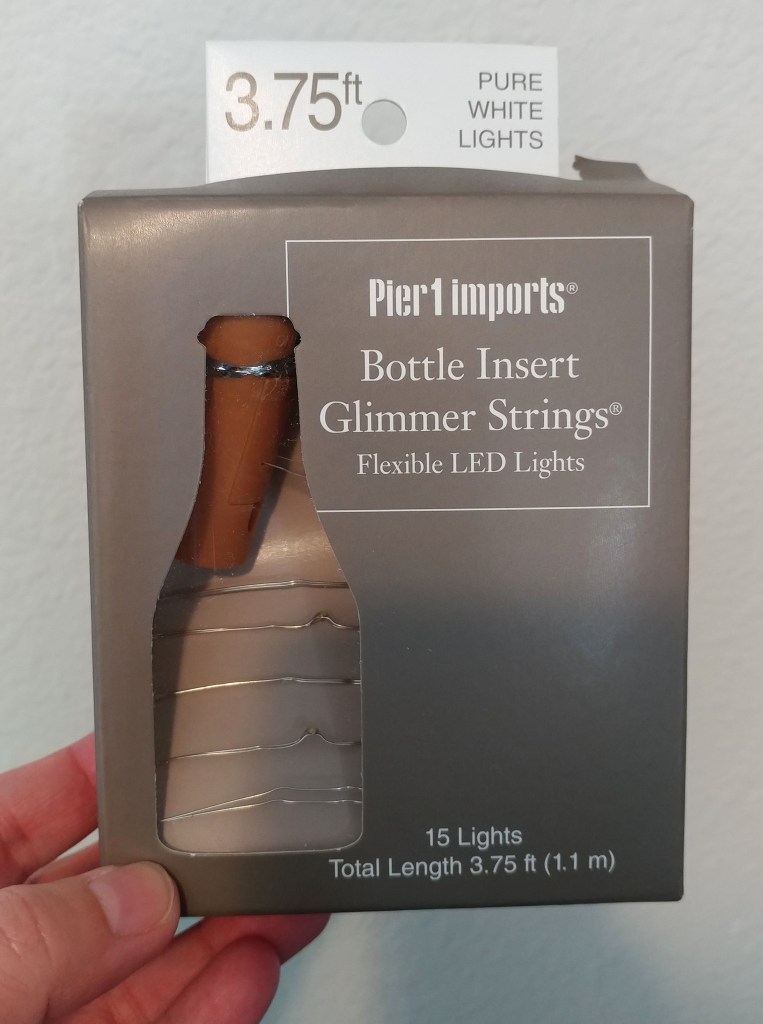
The top has the appearance of a cork and is a standard “wine bottle” size. Your local craft store should have similar options available, or varieties are easily found via Amazon.com; often in a multi-pack, like these.
Enjoy creating these colorful, yet easy works of art while you relax! Feel free to message me with any questions, and please share what you create! After all, this is all about being Creatively Your Best Self!
-jg

Leave a comment