
By Jan Gutowski, Creativity Coach
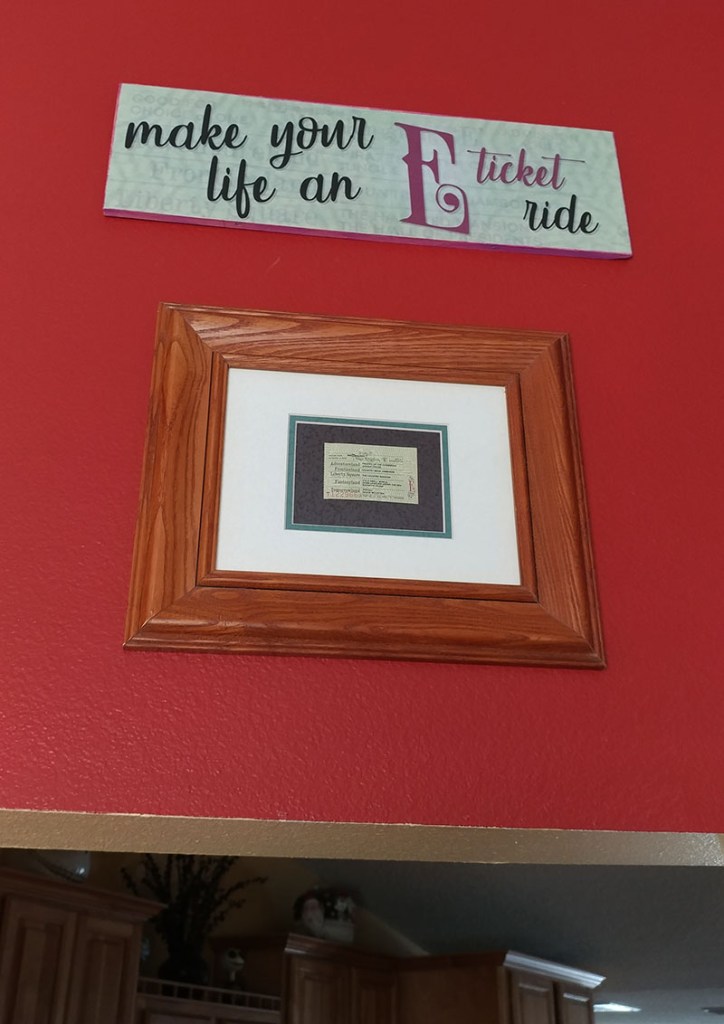
The other day, I was cleaning out closets and rearranging, and I came upon an old Walt Disney World “E” ticket in a matte/frame. I love all things Disney, so this is one of many themed items I have collected over the years.
All of the changes brought about by COVID-19 have given me a new appreciation for life and creativity, in general. I thought it might be fun to take some of this extra time to create a small inspirational decoupage project which I could hang with my E-ticket. I decided on the phrase: “Make your life an E-ticket ride”.
This is an easy and fun way to be creative, without having to go through too much fuss!
Materials:
* Graphic print – created by me, in Photoshop
* Thin pine board – any size to liking (I used a repurposed board from a wine crate – 18″w x 6″h x 1/4″ d
* Hanging hardware (I used a single sawtooth hanger/small tap nails)
* Mod Podge matte water-based sealer
assorted brushes or sponges
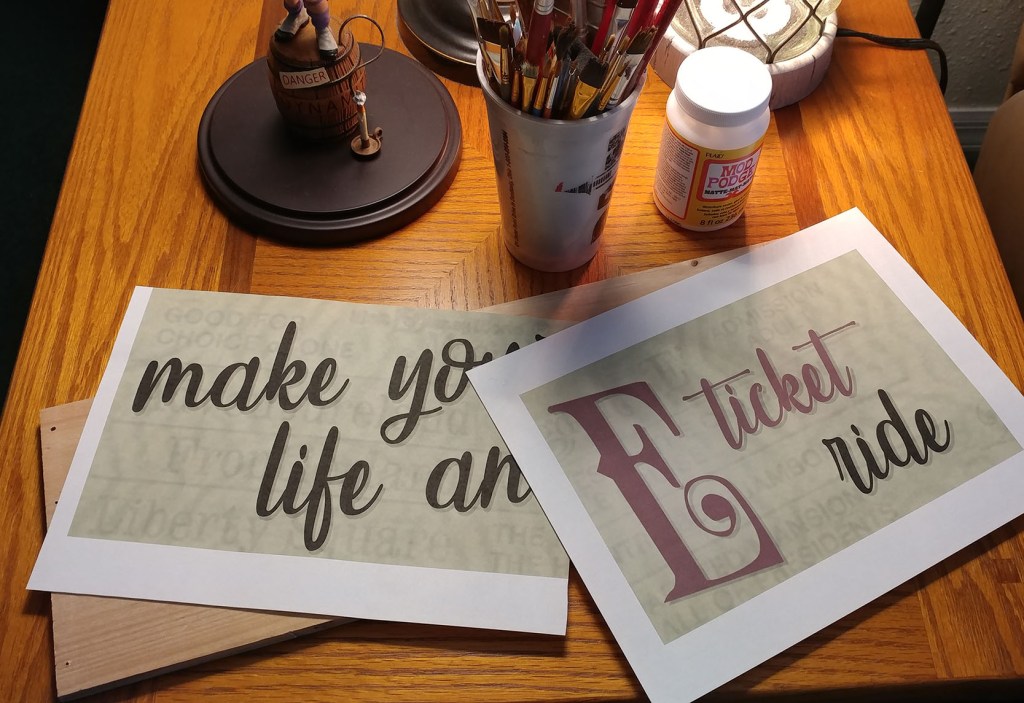
The font is used is called Sweet Hipster, and I used the pen tool in Photoshop to trace the stylized “E” from the ticket itself. Once printed (standard copy paper), trim the white area from the image. In this case, I had to tile print the image in two sections, overlapping them so that I could “stitch-o-pauge” them on the board to make it look like one piece. Before mounting the graphic sheets to the board, attach the hanging hardware to the back.
Once both pieces are trimmed, we are ready to mount them to the board surface. First make sure the board surface is clear of any dust. Spread a thin coat of Mod Podge on the board – this will be used to adhere the first tile.

Once the thin layer is spread to the size of the first image tile, carefully attach the paper from the left edge and apply evenly working to the right, taking care to ensure it is being mounted evenly. Working from left to right will also help reduce air bubbles.
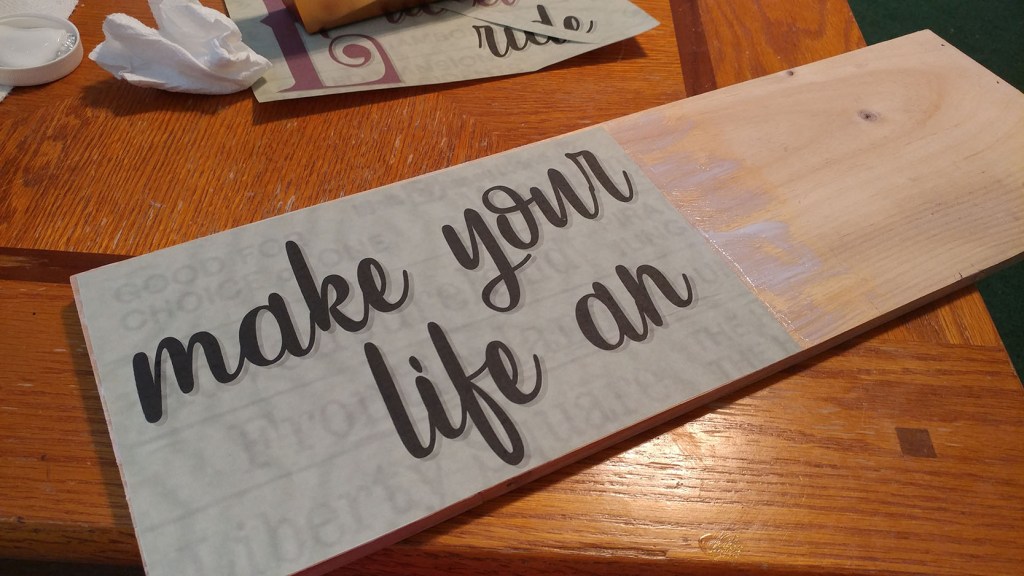
Repeat with the second tile… For this one, I worked from right-edge to left to ensure that I had balanced image cover from edge-to-edge. HINT: If you do not have adequate overlap, don’t worry! It is easy to create a “patch” for the middle which you can cut and line up without any trouble.
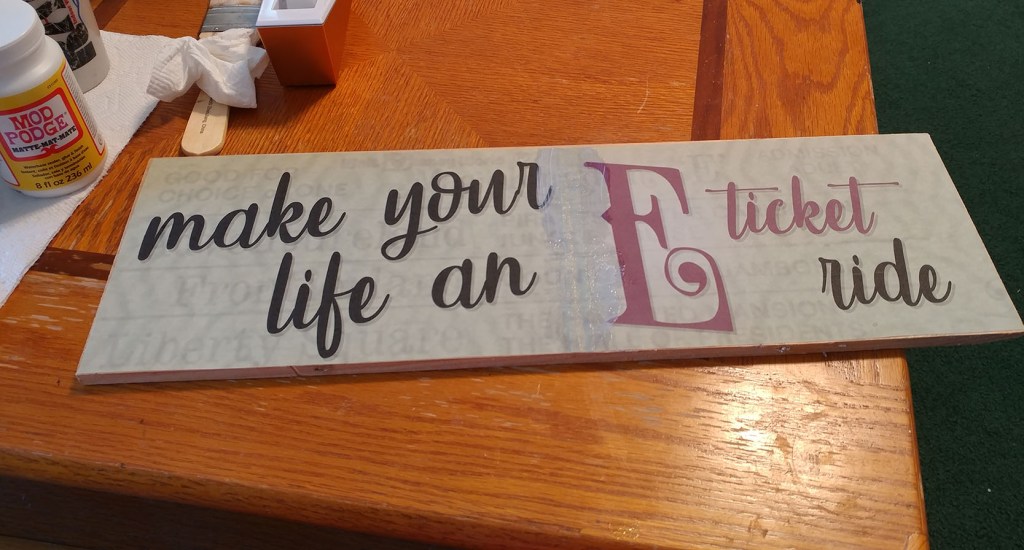
From this point, double check for any air bubbles and very gently smooth them out. I like to use a broad, soft paintbrush to sweep across the image and work any bubbles to the edge. Once complete, let the project rest for 2-3 hours before applying the top coats.
While resting, I chose to touch up the board edges with some matching plum-colored acrylic paint.

After the image has settled into the board, you can apply your top coats of Mod Podge, waiting about 30 minutes between coats. I prefer to do each coat in opposite brush strokes for even cover, and also to give a hint of texture. When applying, ensure that the coats are not too thin, and avoid leaving thick streaks. When the final coat is dry, the piece is ready to hang!

I chose to hang this above the arch in our dining/entry leading into the kitchen.
For more information, or for additional assistance with Adobe tools or creating your own inspirational graphics contact me! Happy crafting!
-jg

I love this! Well done my very creative friend!
LikeLiked by 1 person