
April 14, 2019
By Jan Gutowski, Creativity Coach
Hi all! I have a friend who I used to work with years ago, and soon we are going to be celebrating her retirement! I was able to dig out a group photo of our team in a silly pose, and I thought it would be great to give her something that would not only provide a wonderful memory, but which would also be something functional for her home! So I landed on creating her a small set of 4 coasters with our crazy team’s photo. (Incidentally, this group is the Digital Camera (er, 2D Animation Processing) team from the animated feature Mulan.)
So let’s get started! First you will need the following items:
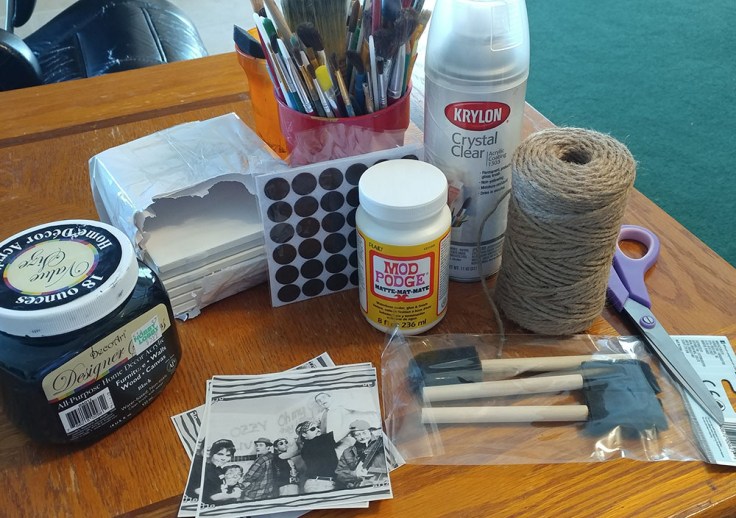
- 4.25″ square tiles (can be purchased at craft stores or at home improvement stores)
- sponge brushes or soft paint brushes
- Mod Podge brand decoupage sealer
- Printed photos on regular copy paper (4″x 4″ is perfect size)
- black acrylic paint
- Acrylic gloss sealer (I use Krylon Crystal Clear)
- felt pads (to protect furniture)
- Ribbon or string to wrap it all up!
- Ensure that the tiles you are using are wiped clean, and free of any dust and dirt
- Print your photos and cut to the 4″x 4″ size
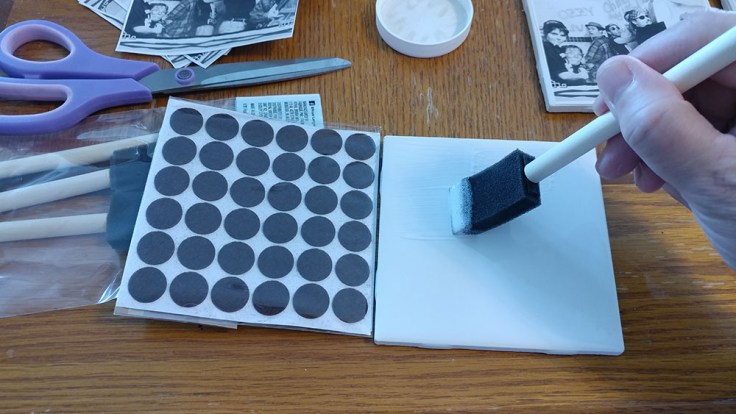
- Apply a thin coat of Mod Podge on the side of the tile on which the photo will be applied. The tiles I used above are standard bathroom tiles, and they had a glazed/glossy top surface which works well!
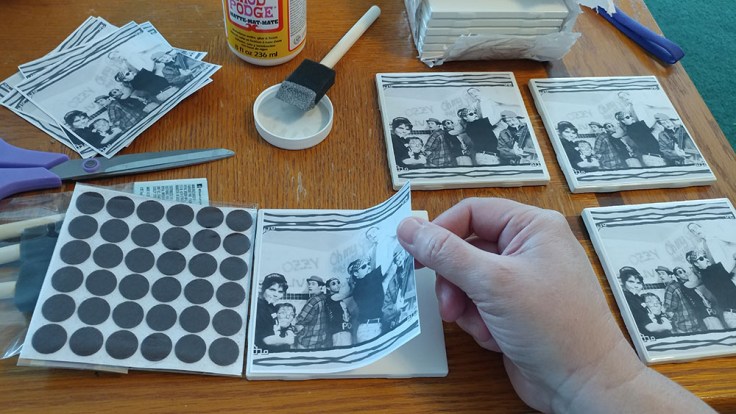
4. Carefully place one of the printed photos on the freshly applied Mod Podge. Work from one side to the other, avoiding any air bubbles. Carefully use a dry finger to smooth out. Let completely dry.
5. Once dry, apply the first coat of Mod Podge across the entire image. I find that going in one direction for each coat works best to ensure a perfect seal. The decoupage will appear white as it is applied but then quickly dries clear. Allow this first coat to completely dry.
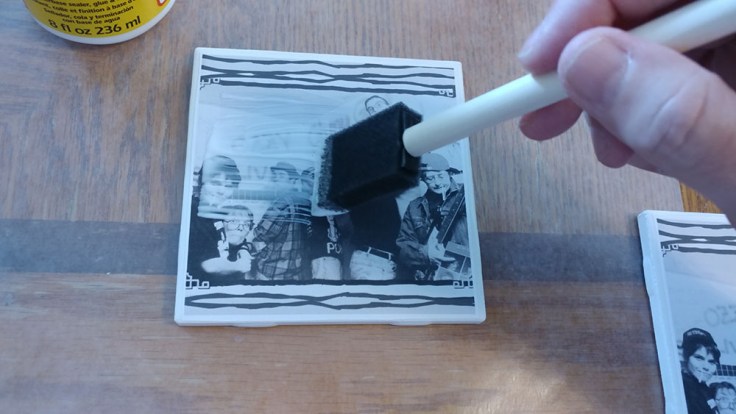
6. Repeat with 2-3 coats, allowing each coat to dry completely before applying the other. Let the coasters dry completely for at least 2-3 hours or until the surface is smooth and there is no indication of stickiness (high humidity areas may need additional dry time).
7. If desired, paint the sides and back of each coaster.

8. Apply a final seal of the Krylon Crystal Clear to both sides of the coasters to give it extra protection from moisture and dust. Then apply the small felt pads to the bottom (4 – one in each corner)

9. Add some ribbon, craft string or whatever you would like to bundle them up in a pretty gift, ready for giving!
Coasters are a great way to give the gift of happy memories, but something else to consider… Creating a tile using the method above, and then including a miniature easel for displaying (found in most craft stores) is also a wonderful idea for desk decor or on a knick-knack shelf.
Reach out if you have any questions! Happy Creating!
-jg

Leave a comment